Introduction
Red Hat Ceph Storage is a high-availability, high-performance storage solution designed for production-grade enterprise workloads. Built on the open-source Ceph project, it delivers enhanced security and scalability. This guide demonstrates how to deploy a Red Hat Ceph cluster in an air-gapped environment, followed by the deployment of both Object (S3-compatible) and Block (RBD) storage solutions.
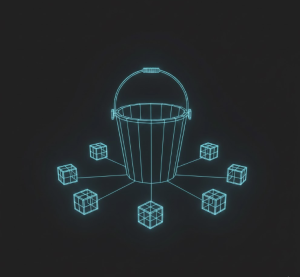
Our Reference Cluster Architecture
The environment relies on a local bastion host for package management and administrative access.
Our Red Hat Ceph Storage cluster setup has the following configuration and settings:
- 1 x bastion
- 1 x Load Balancer running HAProxy
- 3 x storage nodes (node1,node2,node3) with 50 GiB disks for data storage.
- All running RHEL 9.7
- All are on the same subnet.
Please note:
- We have node1 which will act as a bootstrap node and will also be part of the cluster.
- Our bootstrap node needs root password-less SSH access to the other storage nodes.
- Our bastion node needs
sudoprivileges on all nodes (can be ‘root’ user).
Procedure
Initializing the cluster
Download cephadm and required files
We will be using the cephadm bootstrap utility. Connect to the bastion and download the required packages for deploying RHCS:
[root@bastion ~]# curl --remote-name \
--location https://github.com/ceph/ceph/raw/quincy/src/cephadm/cephadm
[root@bastion ~]# chmod +x cephadm
Download rhceph-7-rhel9 image:
[root@bastion ~]# podman pull registry.redhat.io/rhceph/rhceph-7-rhel9
[root@bastion ~]# podman save registry.redhat.io/rhceph/rhceph-7-rhel9 > image-rhceph-7-rhel9.tar
Distribute to nodes
Copy the files to the nodes{1,2,3}:
[root@bastion ~]# for node in node1 node2 node3; do scp ~/image-rhceph-7-rhel9.tar root@$node:/root; done
[root@bastion ~]# for node in node1 node2 node3; do scp ~/cephadm root@$node:/usr/bin; done
SSH into the bootstrapping storage node (the one with root password-less SSH access). Load and tag the RHCS image on the node.
[root@bastion ~]# ssh node1
[root@node1 ~]# podman load -i ~/image-rhceph-7-rhel9.tar
[root@node1 ~]# podman tag registry.redhat.io/rhceph/rhceph-7-rhel9:latest localhost/local/rhceph7:latest
Then, oad and tag the RHCS image on each other storage node.
[root@node1 ~]# for node in node2 node3; do
ssh root@$node "podman load -i /root/image-rhceph-7-rhel9.tar && podman tag registry.redhat.io/rhceph/rhceph-7-rhel9:latest localhost/local/rhceph7:latest"; done
Allow insecure registries on the nodes
Next, on each storage node, edit the registries.conf file to allow insecure registries.
[root@node1 ~]# echo "[[registry]]" >> /etc/containers/registries.conf; echo 'location = "localhost"' >> /etc/containers/registries.conf; echo "insecure = true" >> /etc/containers/registries.conf
[root@node1 ~]# echo "[[registry]]" >> /etc/containers/registries.conf; echo 'location = "localhost/local"' >> /etc/containers/registries.conf; echo "insecure = true" >> /etc/containers/registries.conf
[root@node1 ~]# for node in node2 node3; do
ssh root@$node << 'EOF'
cat << 'INNER' >> /etc/containers/registries.conf
[[registry]]
location = "localhost"
insecure = true
[[registry]]
location = "localhost/local"
insecure = true
INNER
EOF
done
Bootstrap the cluster
Now, let’s bootstrap the cluster from node1. Run the following command, replace <value> with your values:
[root@node1 ~]$ cephadm --image localhost/local/rhceph7:latest bootstrap \
--mon-ip <node1-ip> \
--initial-dashboard-user admin \
--initial-dashboard-password <secure-password> \
--allow-fqdn-hostname \
--dashboard-password-noupdate \
--skip-pull \
--allow-mismatched-release
Verifying podmam|docker is present...
Verifying lvm2 is present...
Verifying time synchronization is in place...
...
Host looks OK
Cluster fsid: ...
Verifying IP <node1-ip> port 3300
Verifying IP <node1-ip> port 6789
Mon IP <node1-ip> is in CIDR network <node1-ip-network>/24
Pulling container image localhost/local/rhceph7:latest...
Ceph version 19.2.3 (c92aebb279828e9c3c1f5d24613efca272649e62) squid (stable)
...
Ceph Dashboard is now available at:
URL: https://<node1-ip>:8443/
User: admin
Password: <secure-password>
...
Bootstrap complete.
Once the command has completed, you finished initializing your Red Hat Ceph Storage cluster.
@NOAM ADD OUTPUT HERE of creation of the cluster
Check Cluster Health
You can enter the cluster using the ‘cephadm shell’ command.
[root@node1 ~]# cephadm shell
[ceph: root@node1 /]# ceph health
HEALTH_OK
NOTE: You might get some warnings and see HEALTH_WARN which is okay to ignore for now.
Ceph Dashboard
If you would like to use the dashboard, use the following command to get the URL:
[ceph: root@node1 /]# ceph mgr services
{
"dashboard": "https://<node1-ip>:8443/",
"prometheus": "http://<node1-ip>:9283/"
}
When you done, exit the ceph shell
[ceph: root@node1 /]# exit
Expanding the cluster
Once we have the cluster up and running, we need to incorporate the other storage nodes into the cluster. For that, we have the next following steps.
The cluster bootstrap process creates a public SSH access key-file at /etc/ceph/ceph.pub
Let’s exit copy the newly created ceph.pub file into node2 and node3:
[root@node1 ~]# for node in node2 node3; \
do ssh-copy-id -f -i /etc/ceph/ceph.pub root@$node; done
Add hosts to the cluster
Enter Ceph shell, and add the hosts to the cluster.
[root@node1 ~]$ cephadm shell
[ceph: root@node1 /]# ceph orch host add node2 <node2-ip>
[ceph: root@node1 /]# ceph orch host add node3 <node3-ip>
Verify the hosts were added
[ceph: root@node1 /]# ceph orch host ls
HOST ADDR LABELS STATUS
node1 <node1-ip> _admin
node2 <node2-ip>
node3 <node3-ip>
3 hosts in cluster
Label your hosts with their corresponding roles.
[ceph: root@node1 /]# for node in node1 node2 node3; \
do ceph orch host label add $node osd,mon; done
Deploy the MON and OSD daemons on the hosts
[ceph: root@node1 /]# ceph orch apply mon --placement="node1 node2 node3"
[ceph: root@node1 /]# ceph orch apply osd --all-available-devices
The above command should take up to a few minutes to deploy the daemons on each node. You should now have successfuly deployed a Red Hat Ceph Cluster in your environment!
Review the cluster status
[ceph: root@node1 /]# ceph status
cluster:
id: <...>
health: HEALTH_OK
services:
mon: 3 daemons, quorum node1,node2,node3 (age 21h)
mgr: node1.dkbnrm(active, since 22h), standbys: node2.mjxrvb
osd: 9 osds: 9 up (since 21h), 9 in (since 21h)
data:
pools: 1 pools, 1 pgs
objects: 2 objects, 577 KiB
usage: 833 MiB used, 449 GiB / 450 GiB avail
pgs: 1 active+clean
Deploying Object Storage on Red Hat Ceph Storage Cluster
In a Red Hat Ceph Storage cluster, object storage is provided by the RADOS Gateway (RGW). It provides an S3-compatible interface that translates RESTful API requests into the cluster’s RADOS format.
Diagram of the end-to-end data flow-path when using object storage on Ceph.
The client sends the data via the loadbalancer, which is configured to choose one of the nodes with an RGW on them (in our case, all 3 storage nodes have one). Then, the RGW performs the write using ‘librados’ to a primary OSD calculated by the CRUSH algorithm. The primary OSD simultaneously replicates the data to n other OSDs in the PG (depends on configuration, default is 3).
NOTE: The node/OSDs mumbers are arbitrary, and in reality, the loadbalancer points to ALL configured RGW nodes, not just one.

Once we have a Ceph cluster set up, we are going to add upon it the ability to store objects. The following section will show you how to deploy this.
Deploy RGW on the nodes
Label the nodes:
[ceph: root@node1 /]# for node in node1 node2 node3; \
do ceph orch host label add $node rgw; done
Deploy the RGW daemon on the nodes:
[ceph: root@node1 /]# ceph orch apply rgw rgw-octopuscs \
--placement="label:rgw"
NOTE: This command might take a few minutes to complete.
Verify that the deployment worked:
[ceph: root@node1 /]# ceph orch ls
NAME PORTS RUNNING REFRESHED AGE PLACEMENT
...
rgw.rgw-octopuscs ?:80 3/3 7s ago 9s label:rgw
[ceph: root@node1 /]# ceph orch ps --daemon_type=rgw
NAME HOST PORTS STATUS
rgw.rgw-octopuscs.node1.aqbnrg node1 *:80 running (49s)
rgw.rgw-octopuscs.node2.hyjmrr node2 *:80 running (42s)
rgw.rgw-octopuscs.node3.nynnyr node3 *:80 running (36s)
Install the LoadBalancer
On bastion, download the HAProxy package and any required dependencies. Then, copy it to the loadbalancer
[root@bastion ~]# mkdir -p ~/ceph-cluster-packages/loadbalancer-packages/haproxy && cd ~/ceph-cluster-packages/loadbalancer-packages/haproxy
[root@bastion haproxy]# dnf download --resolve haproxy
[root@bastion haproxy]# scp haproxy-<version>.rpm root@loadbalancer:/root
Install the HAProxy package on the loadbalancer node.
[root@bastion haproxy]# ssh loadbalancer
[root@loadbalancer ~]# ll
-rw-r--r--. 1 root root 2615238 Jan 22 11:13 haproxy-<version>.rpm
[root@loadbalancer ~]# dnf install -y ./haproxy-<version>.rpm
Configure HAProxy to serve the OSD nodes
Backup the original haproxy.cfg and replace the contents with the below configuration
(replace <value> with your values).
[root@loadbalancer ~]# cp haproxy.cfg haproxy.cfg.backup
[root@loadbalancer ~]# cat haproxy.cfg
# HAProxy configuration
# ---------------------
defaults
timeout connect 10s
timeout client 5m
timeout server 5m
timeout http-request 10s
timeout http-keep-alive 2m
listen stats
bind *:8080
mode http
stats enable
stats uri /haproxy_stats
stats auth admin:<secure-password> # Replace with your password
# ---------------------------------------------------------------------
# S3 Object Storage Frontend (Public Facing)
# ------------------------------------------
frontend rgw_frontend
bind *:80
mode http
option httplog
default_backend rgw_nodes
# ---------------------------------------------------------------------
# RGW Backend Nodes (The Storage Nodes)
# ---------------------------------------------------------------------
backend rgw_nodes
mode http
balance leastconn
option httpchk GET /
# The 'check' parameter tells HAProxy to monitor if the node is alive
server node1 <node1-ip>:80 check
server node2 <node2-ip>:80 check
server node3 <node3-ip>:80 check
Start HAProxy service
[root@loadbalancer ~]# systemctl enable --now haproxy
Check the HAproxy service
You can check connectivity to the cluster via the loadbalancer. You can use bastion for this.
[root@bastion ~]# curl http://loadbalancer
<?xml version="1.0" encoding="UTF-8"?><ListAllMyBucketsResult xmlns="http://s3.amazonaws.com/doc/2006-03-01/"><Owner><ID>anonymous</ID><DisplayName></DisplayName></Owner><Buckets></Buckets></ListAllMyBucketsResult>
Using the Object Storage on a Red Hat Ceph Storage Cluster
In this section, we will showcase how to store files in our Red Hat Ceph Storage cluster using the AWS S3 API. For that, we need to create an S3 entity in our Red Hat Ceph Storage cluster to make authorized requests, and an S3-compatible API tool for read/write operations. We will use the s3cmd tool.
Create a New radosgw Entity
[root@node1 ~]# cephadm shell
[ceph: root@node1 /]# radosgw-admin user create --uid=s3admin \
--display-name="S3 Administrator" \
--access-key=<access-key> --secret=<secret>
Install and Configure the s3cmd Tool
On bastion, download the s3cmd repository.
[root@bastion~]# cd /etc/yum.repos.d/
[root@bastion~]# wget http://s3tools.org/repo/RHEL_6/s3tools.repo
Install the s3cmd tool:
[root@bastion~]# dnf install -y s3cmd
[root@bastion~]# s3cmd --version
s3cmd version 2.4.0
Configure s3cmd to point to your local S3 object storage:
(replace <value> as needed)
[root@bastion ~]# s3cmd --configure
Enter new values or accept defaults in brackets with Enter.
Refer to user manual for detailed description of all options.
Access key and Secret key are your identifiers for Amazon S3. Leave them empty for using the env variables.
Access Key: <access-key>
Secret Key: <secret>
Default Region [US]: default
Use "s3.amazonaws.com" for S3 Endpoint and not modify it to the target Amazon S3.
S3 Endpoint [s3.amazonaws.com]: loadbalancer
Use "%(bucket)s.s3.amazonaws.com" to the target Amazon S3. "%(bucket)s" and "%(location)s" vars can be used
if the target S3 system supports dns based buckets.
DNS-style bucket+hostname:port template for accessing a bucket [%(bucket)s.s3.amazonaws.com]: loadbalancer/%(bucket)s
Encryption password is used to protect your files from reading
by unauthorized persons while in transfer to S3
Encryption password:
Path to GPG program [/bin/gpg]: <Enter>
When using secure HTTPS protocol all communication with Amazon S3
servers is protected from 3rd party eavesdropping. This method is
slower than plain HTTP, and can only be proxied with Python 2.7 or newer
Use HTTPS protocol [Yes]: No
On some networks all internet access must go through a HTTP proxy.
Try setting it here if you can't connect to S3 directly
HTTP Proxy server name: <Enter>
New settings:
Access Key: <access-key>
Secret Key: <secret>
Default Region: default
S3 Endpoint: loadbalancer
DNS-style bucket+hostname:port template for accessing a bucket: %(bucket)s.s3.amazonaws.com
Encryption password:
Path to GPG program: /bin/gpg
Use HTTPS protocol: False
HTTP Proxy server name:
HTTP Proxy server port: 0
Test access with supplied credentials? [Y/n] Y
Please wait, attempting to list all buckets...
Success. Your access key and secret key worked fine :-)
Now verifying that encryption works...
Not configured. Never mind.
Save settings? [y/N] y
Configuration saved to '/root/.s3cfg'
Modify the newly created s3cmd file:
[root@bastion ~]# sed -i 's|host_bucket = .*|host_bucket = loadbalancer|g' ~/.s3cfg
NOAM TODO why do we need this change?
Create an S3 bucket
[root@bastion ~]# s3cmd ls
[root@bastion ~]# s3cmd mb s3://octopuscs-storage
Bucket 's3://octopuscs-storage/' created
[root@bastion ~]# s3cmd ls
2026-01-25 15:15 s3://octopuscs-storage
Verify that the bucket can store/retrieve data
For this, we are going to create a 10 GiB ’empty’ file on our bastion. Make sure your bastion has enough storage to accommodate this file. Notice the OSD’s utilization before and after.
[ceph: root@node1 /]# ceph osd df
ID CLASS RAW USE DATA META AVAIL %USE
2 hdd 104 MiB 3.7 MiB 101 MiB 50 GiB 0.20
5 hdd 108 MiB 3.7 MiB 105 MiB 50 GiB 0.21
8 hdd 101 MiB 4.2 MiB 97 MiB 50 GiB 0.20
0 hdd 104 MiB 3.7 MiB 101 MiB 50 GiB 0.20
3 hdd 105 MiB 4.3 MiB 101 MiB 50 GiB 0.21
6 hdd 108 MiB 3.7 MiB 105 MiB 50 GiB 0.21
1 hdd 100 MiB 3.7 MiB 97 MiB 50 GiB 0.20
4 hdd 104 MiB 3.7 MiB 101 MiB 50 GiB 0.20
7 hdd 109 MiB 4.3 MiB 105 MiB 50 GiB 0.21
TOTAL 946 MiB 35 MiB 911 MiB 449 GiB 0.21
On bastion, create test directories. Then, create an a 10 GiB file. The command might take a few minutes to complete.
[root@bastion ~]# mkdir -p /tmp/test/{put,get} && cd /tmp/test/put
[root@bastion put]# dd if=/dev/zero of=/tmp/test/put/big-file bs=4M count=2500
...
10485760000 bytes (10 GB, 9.8 GiB) copied, 8.43405 s, 1.2 GB/s
Upload the file to the Ceph S3 bucket.
[root@bastion put]# s3cmd --acl-public put /tmp/test/put/big-file s3://octopuscs-storage/
...
upload: 'big-file' -> 's3://octopuscs-storage/big-file' [part 667 of 667, 10MB] [1 of 1]
10485760 of 10485760 100% in 0s 18.25 MB/s done
Public URL of the object is: http://loadbalancer/octopuscs-storage/big-file
[root@bastion put]# s3cmd ls s3://octopuscs-storage
2026-01-25 15:31 10485760000 s3://octopuscs-storage/big-file
Check OSD’s utilization now.
Notice that even though the file is 10 GiB, the ‘DATA’ column shows ~30 GiB usage. That is because Ceph’s default configuration is to replicate any data in any pool 3 times.
[ceph: root@node1 /]# ceph osd df
ID CLASS RAW USE DATA META AVAIL %USE
2 hdd 2.6 GiB 2.5 GiB 118 MiB 47 GiB 5.29
5 hdd 4.0 GiB 3.9 GiB 132 MiB 46 GiB 7.97
8 hdd 3.5 GiB 3.4 GiB 136 MiB 46 GiB 7.04
0 hdd 3.9 GiB 3.7 GiB 132 MiB 46 GiB 7.73
3 hdd 3.5 GiB 3.4 GiB 158 MiB 46 GiB 7.04
6 hdd 2.8 GiB 2.7 GiB 130 MiB 47 GiB 5.62
1 hdd 2.3 GiB 2.2 GiB 126 MiB 48 GiB 4.64
4 hdd 6.3 GiB 6.1 GiB 175 MiB 44 GiB 12.60
7 hdd 1.6 GiB 1.5 GiB 114 MiB 48 GiB 3.14
TOTAL 31 GiB 29 GiB 1.2 GiB 419 GiB 6.79
Next, pull the file from the S3 bucket back to the bastion node.
[root@bastion put]# rm /tmp/test/put/big-file
[root@bastion put]# cd /tmp/test/get
[root@bastion get]# wget http://loadbalancer/octopuscs-storage/big-file
--2026-01-22 13:21:36-- http://loadbalancer/octopuscs-storage/big-file
...
HTTP request sent, awaiting response... 200 OK
Length: 10485760000 (9.8G) [binary/octet-stream]
Saving to: ‘big-file’
big-file 100%[==============================================>] 9.77G 85.3MB/s in 2m 6s
2026-01-22 13:23:42 (79.4 MB/s) - ‘big-file’ saved [10485760000/10485760000]
[root@bastion get]# ll
total 10240000
-rw-r--r--. 1 root root 10485760000 Jan 22 13:05 big-file
Remove the file from bastion and from the S3 bucket
[root@bastion get]# rm big-file
[root@bastion get]# s3cmd ls s3://octopuscs-storage
2026-01-25 15:31 10485760000 s3://octopuscs-storage/big-file
[root@bastion get]# s3cmd rm s3://octopuscs-storage/big-file
[root@bastion get]# s3cmd ls s3://octopuscs-storage
(no output)
Clean the bucket with Garbage Collector
On node1, manually trigger Ceph’s garbage collector.
[root@node1 ~]# cephadm shell
[ceph: root@node1 /]# radosgw-admin gc process --include-all
NOTE: Be careful running this on a production cluster. Running
gc processmanually will cause a performance hit.
Deploying RBD storage solution on a Red Hat Ceph Storage cluster
RBD (RADOS Block Device) is a Red Hat Ceph Storage service that provides block storage. It allows users to mount storage as a virtual block device, much like a physical hard drive, making it an ideal choice for providing disk space to virtual machines and even as Kubernetes/OpenShift volumes.
Diagram of the end-to-end data flow-path when using RBD with Ceph
NOTE: The node/OSDs mumbers are arbitrary.

In the following section, we will showcase how to deploy RBD storage solution on a Red Hat Ceph Storage cluster. This will be done on our bastion, acting as the client node.
Create an RBD pool and volume
On node1, enter the Ceph shell and create an RBD pool and volume.
[root@node1 ~]# cephadm shell
[ceph: root@node1 /]# ceph osd pool create octopuscs-rbd-pool
pool 'octopuscs-rbd-pool' created
Initiate the rbd pool and create a new volume. Set the size to 30GiB for example.
[ceph: root@node1 /]# rbd pool init octopuscs-rbd-pool
[ceph: root@node1 /]# rbd create --size 30G --pool octopuscs-rbd-pool octopuscs-volume
[ceph: root@node1 /]# rbd ls --pool octopuscs-rbd-pool -l
NAME SIZE PARENT FMT PROT LOCK
octopuscs-volume 30 GiB 2
Exit the Ceph shell, and enter it again, this time with a mounted volume to create a new RBD client keyring:
[ceph: root@node1 /]# exit
[root@node1 ~]# cephadm shell --mount /etc/ceph/
[ceph: root@node1 /]# ceph auth get-or-create client.octopuscs-rbd \
mon 'profile rbd' osd 'profile rbd' \
-o /mnt/ceph.client.octopuscs-rbd.keyring
[ceph: root@node1 /]# exit
Connect to rbd as a client
Copy the the required files to the target client node. We are going to use bastion as our client node for the demonstration.
[root@node1 ~]# scp /etc/ceph/{ceph.client.octopuscs-rbd.keyring,ceph.conf} root@bastion:/root
[root@node1 ~]# scp /usr/bin/cephadm root@bastion:/usr/bin
On our RBD client node, Enable and install the required repositories.
[root@bastion ~]# subscription-manager repos \
--enable codeready-builder-for-rhel-9-$(arch)-rpms
[root@bastion ~]# dnf install -y \
https://dl.fedoraproject.org/pub/epel/epel-release-latest-9.noarch.rpm
[root@bastion ~]# /usr/bin/crb enable
Install the Ceph client packages:
[root@bastion ~]# cephadm add-repo --release squid
[root@bastion ~]# dnf update -y
[root@bastion ~]# dnf install -y ceph-common
[root@bastion ~]# ceph -v
ceph version 19.2.3 (c92aebb279828e9c3c1f5d24613efca272649e62) squid (stable)
Enable the RBD kernel module, and copy the ceph files to /etc/ceph
[root@bastion ~]# modprobe rbd
[root@bastion ~]# mv ~/ceph.* /etc/ceph
Next, map the Ceph RBD pool/volume to our local machine as a disk.
[root@bastion ~]# rbd -n client.octopuscs-rbd device map \
–pool octopuscs-rbd-pool octopuscs-volume
/dev/rbd0
Check that the rbd is mapped:
[root@bastion rbd-test]# rbd showmapped
id pool namespace image snap device
0 octopuscs-rbd-pool octopuscs-volume – /dev/rbd0
Format the disk in your required file format. Then, mount it onto a directory.
[root@bastion ~]# mkfs.ext4 /dev/rbd0
[root@bastion ~]# mkdir -p /mnt/ceph-rbd
[root@bastion ~]# mount /dev/rbd0 /mnt/ceph-rbd
[root@bastion ~]# df -h | grep rbd
Filesystem Size Used Avail Use% Mounted on
/dev/rbd0 20G 24K 19G 1% /mnt/ceph-rbd
Write and Test data
In this section, we will test the RBD. We will write data to in one node, then mount the same RBD in another node. We will check if the data is not corrupted. For that, we are going to need ~20 GiB of free storage space on the node, and ~20 GiB storage space in the Ceph cluster.
Download using ‘curl’ the following file to the first node. It’s a ~1MiB text file containing the first one million digits of Pi.
[root@bastion ~]# curl https://ceph.co.il/wp-content/uploads/2026/01/pi-digits-1m.txt > pi-digits-1m.txt
[root@bastion ~]# ll -h
-rw-r--r--. 1 root root 977K Jan 26 10:17 pi-digits-1m.txt
Create a 20 GiB file from the original one. This might take a few minutes to complete.
[root@bastion ~]# touch pi-digits-1m-20gb.txt
[root@bastion ~]# for i in {1..20500}; do \
cat pi-digits-1m.txt >> pi-digits-1m-20gb.txt; \
echo "" >> pi-digits-1m-20gb.txt; done
[root@bastion ~]# ll -h
-rw-r--r--. 1 root root 20G Jan 26 10:27 pi-digits-1m-20gb.txt
-rw-r--r--. 1 root root 977K Jan 26 10:17 pi-digits-1m.txt
Generate a checksum for the file. This might take a few minutes to complete.
[root@bastion ~]# sha1sum pi-digits-1m-20gb.txt | \
cut -f 1 -d " " > pi-digits-1m-20gb-checksum
[root@bastion ~]# cat pi-digits-1m-20gb-checksum
6514c40f8dab7ac44dba22623c25eb4a571d209f
Next, move the 20GiB file to the mounted RBD directory.
[root@bastion ~]# mv pi-digits-1m-20gb.txt /mnt/ceph-rbd/
Then, unmount and unmap the RBD image. This might take a few minutes to complete.
[root@bastion rbd-test]# umount /mnt/my-rbd
[root@bastion rbd-test]# rbd unmap /dev/rbd0
Check the mapping (should show no output):
[root@bastion rbd-test]# rbd showmapped
Download the required packages and tarball them. We are going to use node1 for our second RBD client.
[root@bastion rbd-test]# mkdir -p ~/ceph-cluster-packages/rbd-clients-packages/ceph-common && ~/ceph-cluster-packages/rbd-clients-packages/ceph-common
[root@bastion ceph-common]# dnf download -y ceph-common --resolve --alldeps
[root@bastion ceph-common]# cd .. && tar -cvzf ceph-common.tar.gz ceph-common/
Copy the tarball to the target node, then SSH into it.
[root@bastion rbd-clients-packages]# scp ceph-common.tar.gz root@node1:/root
[root@bastion rbd-clients-packages]# ssh node1
Extract the tarball and install the packages.
[root@node1 ~]# tar -xvzf ceph-common.tar.gz ceph-common/ && cd ceph-common
[root@node1 ~]# dnf install -y ./*.rpm --skip-broken
[root@node1 ~]# ceph -v
ceph version 19.2.3 (c92aebb279828e9c3c1f5d24613efca272649e62) squid (stable)
Enable the RBD kernel module. This loads the RBD drivers into the Linux kernel and enables RBD features on the system.
[root@node1 ~]# modprobe rbd
Then, map and mount the disk onto a directory.
[root@node1 ~]# rbd -n client.octopuscs-rbd device map \
--pool octopuscs-rbd-pool octopuscs-volume
[root@node1 ~]# rbd showmapped
id pool namespace image snap device
0 octopuscs-rbd-pool octopuscs-volume - /dev/rbd0
[root@node1 ~]# mkdir -p /mnt/ceph-rbd
[root@node1 ~]# mount /dev/rbd0 /mnt/ceph-rbd/
[root@node1 ~]# df -h
Filesystem Size Used Avail Use% Mounted on
/dev/rbd0 30G 20G 8.9G 69% /mnt/ceph-rbd
[root@node1 ~]# ll -h /mnt/ceph-rbd/
-rw-r--r--. 1 root root 20G Jan 26 10:27 pi-digits-1m-20gb.txt
Next, generate a checksum and copy it into the first node. This might take a few minutes to complete.
[root@node1 ~]# sha1sum /mnt/ceph-rbd/pi-digits-1m-20gb.txt | \
cut -f 1 -d " " > ~/pi-digits-1m-20gb-checksum-transfered
[root@node1 ~]# scp ~/pi-digits-1m-20gb-checksum-transfered root@bastion:/root/pi-digits-1m-20gb-checksum
SSH back into bastion and compare the checksums. If they are the same, the ‘diff’ command will show no output, and it will mean that the data was not corrupted/changed during transfers.
[root@node1 ~]# exit
[root@bastion rbd-clients-packages]# cd ~
[root@bastion ~]# ll
-rw-r--r--. 1 root root 64 Jan 26 10:39 pi-digits-1m-20gb-checksum
-rw-r--r--. 1 root root 78 Jan 26 11:14 pi-digits-1m-20gb-checksum-transfered
[root@bastion ~]# diff pi-digits-1m-20gb-checksum pi-digits-1m-20gb-checksum-transfered
Summary
In this guide, we learned how to deploy a Red Hat Storage Ceph cluster on an air-gapped environment, how to set up S3 API compatible object storage solution within the cluster. Additionaly, we learned how to deploy block device storage solution within the cluster.
To advance the cluster’s capabilities further, check out our other guides on How to Deploy a Multi-Site Ceph Storage Gateway, and How To Use REST API with RADOS Gateway.
Make sure to check out the Red Hat Ceph Storage Docs for a complete configuration options for your Ceph cluster.