Introduction
In Proxmox, there is an integrated version of Ceph that provides capabilities through a user friendly graphic interface. Using that Interface you will install Ceph on the specified nodes and deploy the main components (OSDs, MONs, MGRs) of Ceph. After deploying these main components you’ll need to deploy an object gateway (RADOS gateway) and to create the object gateway user, access key and secret, to provide S3 compatible APIs to communicate with the Ceph cluster. When done, you will know How to Deploy Highly Available Ceph on Proxmox.
Let’s break it down.
Procedure
1. Install Ceph
In your Proxmox cluster choose a node that you want to deploy the Ceph cluster on.
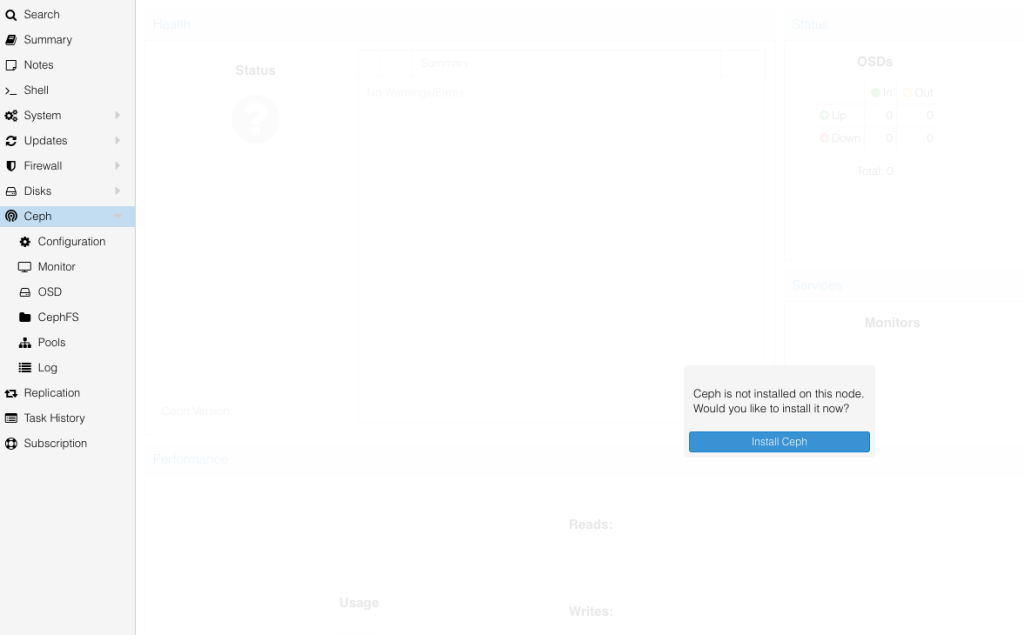
On each node look for the Ceph tab, when you press on it you will get a pop up with the message
Ceph is not installed on this node, Would you like to install it now
Press Install Ceph
Choose the desired version and choose the repository (Enterprise/No-Subscription/Test)
**Choose No-Subscription if you don’t have a subscription.
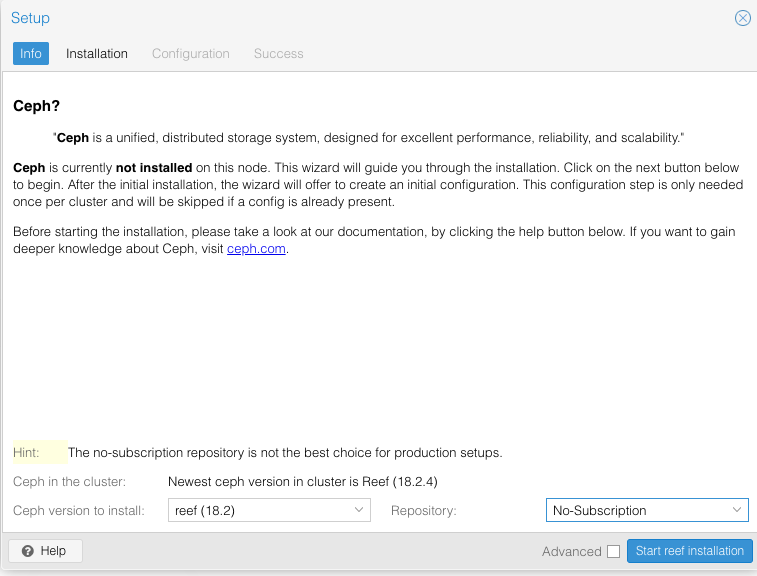
Press start <selected version> installation

When prompted Press Y and ENTER.
Wait until you see the Installed successfully line
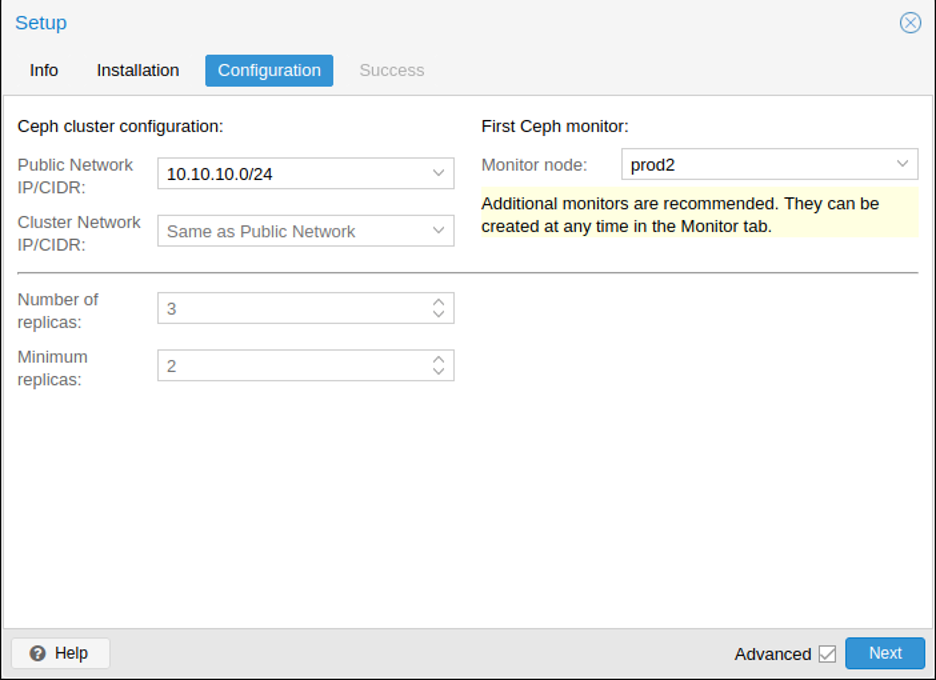
Press Next
In the next step you choose a public network for the MON traffic and the communication with the cluster, and another private network for the OSDs .
Configuring a separate cluster network might improve cluster performance by decreasing the public network traffic load and separating client traffic from back-end OSD operations traffic.
Great !
Now you have a running minimal Ceph deployment running!
2. Make our Ceph cluster Highly Available
The next step is to configure Ceph to be Highly Available.
This includes, deploying OSD (Object Storage Devices), creating Monitors and adding Managers. This is done for achieving redundancy and replication of the data.
Deploying OSDs
In order to create OSDs using disks, you must verify the disk is not partitioned and not in use.
Preparing the Disks on Each Node
First, ensure the disk is not partitioned using parted utility
$ parted /dev/sdb mklabel gpt
Second, Use zap to Ensure removing all data remains from earlier use.
$ ceph-volume lvm zap /dev/sdb –destroy
Repeat this step for each disk in each node
Create the OSDs on Each Node
Using the cli:
Enter the following command:
$ pveceph osd create /dev/sdb
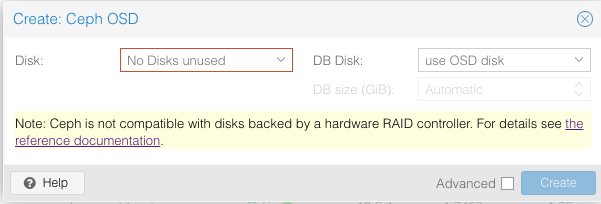
Alternatively you can use the web wizard:
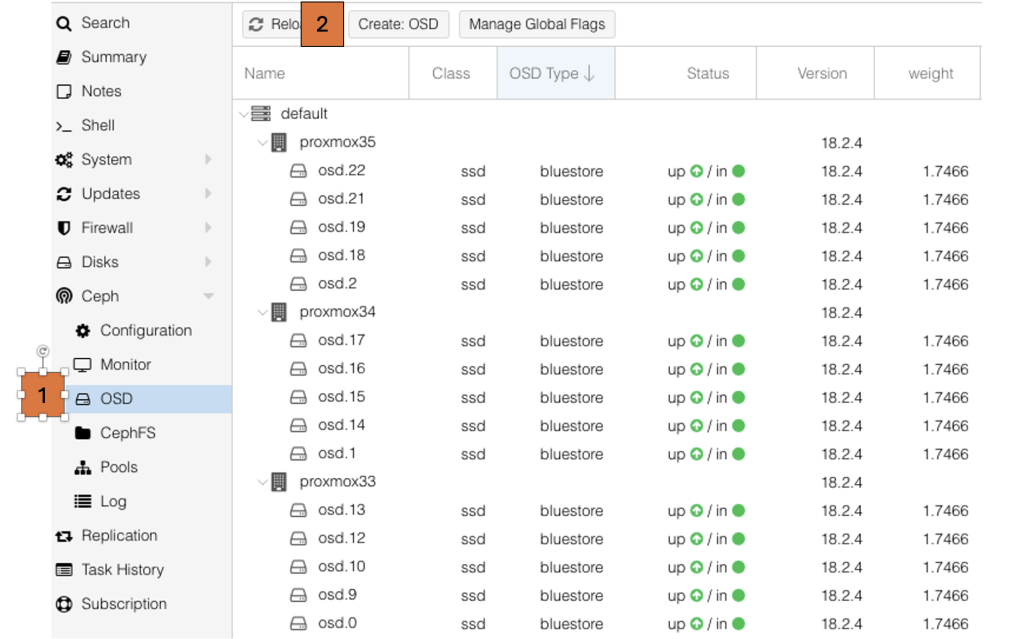
Choose the disk:
NOTE: Choose a non partitioned disk
Create more Monitors
Using the cli:
Enter the following command:
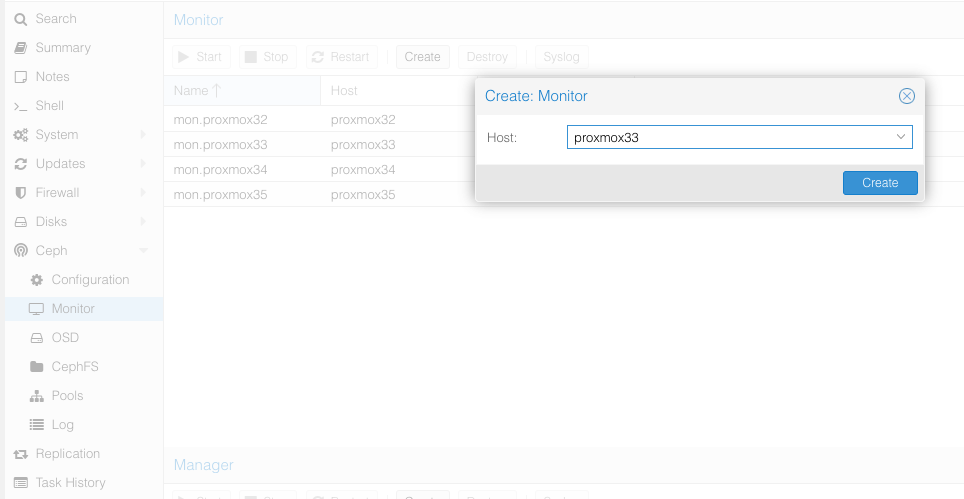
$ pveceph mon createAlternatively you can use the web wizard:
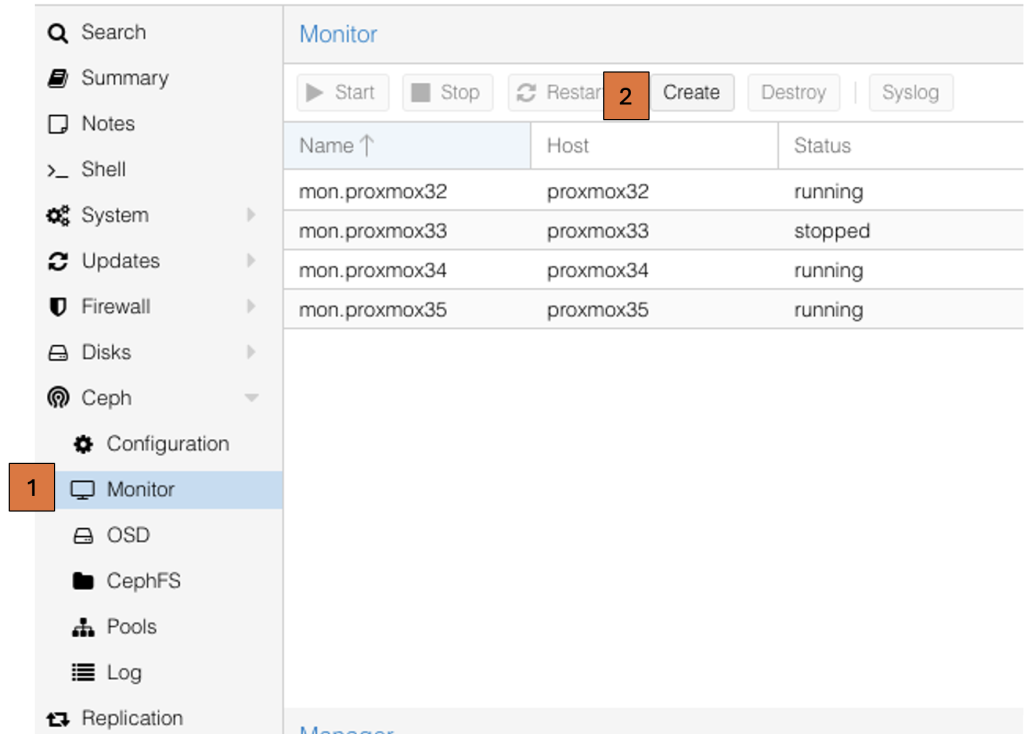
Choose the node you want to deploy the Monitor on:
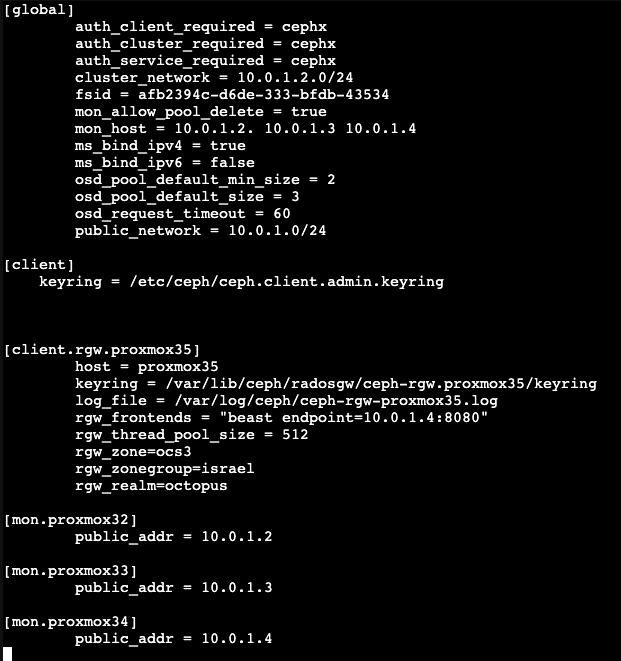
**You can control all components using the centralized configuration file, which you can find in /etc/ceph/ceph.conf
The next step is to create an object gateway in order to enable the Ceph cluster to communicate with S3 APIs so we can provide clients the ability to store data in the cluster.
3. Create a RADOS gateway
Given that Proxmox does not use an orchestrator, the way to create a Gateway is to define it in the centralized configuration file and then to start it using the systemctl utility.
1. First you must install the radosgw package
$ apt install radosgw2. Create a RADOS gateway user with the desired capabilities
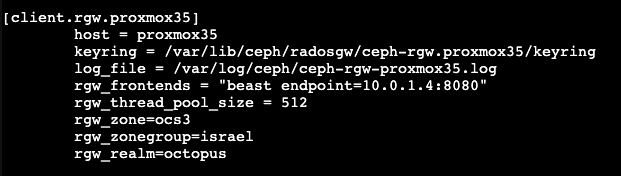
$ ceph auth get-or-create client.rgw.<node> osd 'allow rwx' mon 'allow rw' -o /etc/ceph/ceph.client.rgw.<node>.keyring3. To run RADOS Gateway (RGW) on a node, add its configuration to /etc/ceph/ceph.conf, specifying the hostname, keyring, log file, frontend endpoint, and zone settings, as shown for proxmox35.
4. Start the RADOS gateway using systemctl on every node:
$ systemctl start ceph-radosgw@rgw.<hostname>5. Enable the service on every node:
$ systemctl enable ceph-radosgw@rgw.<hostname>4. Create the Data pools:
After creating the RADOS gateway, several pools will be automatically generated.
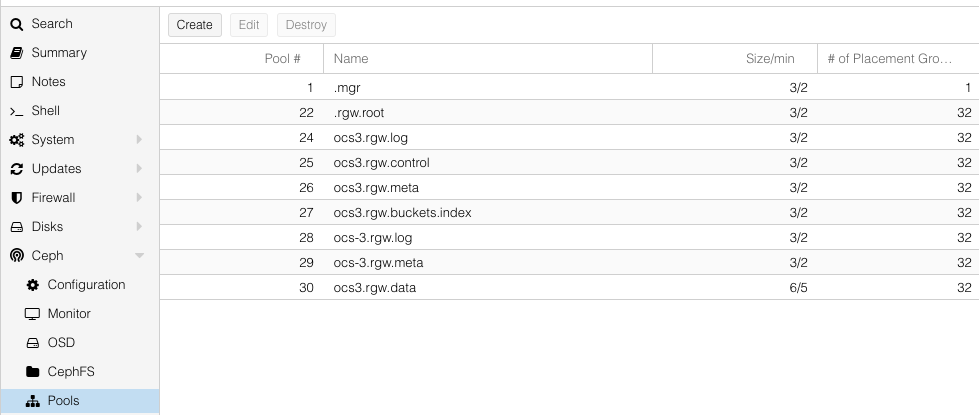
These pools are used to manage the RADOS gateway, and are all replicated pools.
Data Pool
In addition to these pools we will create a data pool.
According to our needs we will create an erasure code pool.
Erasure Code Profile
First we will create an erasure-code-profile:
in the following example we create an erasure code profile of 4 + 2 with a failure domain of OSD
$ ceph osd erasure-code-profile set ec42 \ k=4 m=2 \ crush-failure-domain=osd
Create the Pool
Then we will create the pool using this profile and the <zone>.rgw.data convention With 128 PGs
$ ceph osd pool create <zone>.rgw.data 128 128 erasure ec42Enable RGW Mode
Let’s enable the pool to use rgw mode:
$ ceph osd pool application enable ny.rgw.data rgwWell Done ! We now have RGW enabled.
Summary
By following our guide of How Deploy Highly Available Ceph on Proxmox, you have successfully deployed the Ceph cluster with an S3-compatible RADOS Gateway. The process included installation on Proxmox nodes, configuring public and private networks, and deploying key Ceph components such as Monitors (MONs), Managers (MGRs), and OSDs to ensure production grade storage deployment. Finally, a Ceph RADOS Gateway (RGW) was set up, enabling S3-compatible object storage for cloud-native applications.
At Octopus we deploy Ceph for multiple customers from various sectors with strict demands. This deployment provides our take on a production grade storage solution that integrates with Proxmox, allowing for efficient block, file, and object storage management within your infrastructure.
To take your Ceph deployment further and enable multi-site replication for high availability and disaster recovery, check out our next guide: How to Deploy Multi-Site Ceph Object Gateway.